Wednesday, May 26, 2010

Strawberry/Raspberry Fruit Leather

I am just going to say it now, this post has a very sad ending. Prepare yourselves.

Thanks to my Sis-in-law Sheena for this recipe and to the person she got the recipe from. Here is the link. I decided to add raspberries. :)

Strawberry/Raspberry Fruit Leather
3lbs Strawberries
12 oz Raspberries
2 cups of unsweetened applesauce
Juice of ½ lemon
1 Cup Sugar


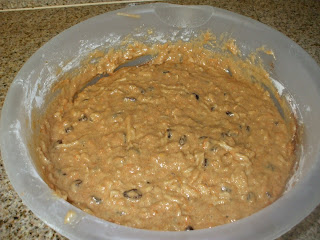
1. Blend all the fruit together. I am LOVING my blender these days.

2. Add sugar and bring to a boil. Once it's boiling turn the heat down and let it simmer. Scoop off all the foam with a spoon. Let it simmer for 30-45 minutes or until it starts to thicken up like applesauce. Mine never really got that thick so I gave up and put it on the pan. :)


3. Pour on a pan lined with parchment paper. I used wax paper. It does not work well and I don't recommend it. I learned that there is a difference between the two today. Lucky me.


4. Bake at 170 for 8-10 hours. You're basically dehydrating it. I forgot about mine, went to bed and woke up at 2am and jumped out of bed because I realized that it was STILL in the oven!!!! I cooked mine for 13 hours. I also had the heat at 200 for the first 6 hours so it was even worse!!!!

Mine is ruined and all of it is in the trash. The wax paper won't really come off of the fruit leather (and it ruined my cookie sheet) and the fruit is crunchy and tart and overcooked. It took me about an hour to go back to sleep last night because I was SO upset about it. I just couldn't stop thinking about all of those BEAUTIFUL strawberries and raspberries and the last of Grandma Packer's applesauce and all the time and energy my poor oven went through. UGH! Just thinking about it is infuriating. I hate kitchen disasters.

One time I made a very beautiful, delicious, huge potato salad for a family reunion at Bear Lake. When we arrived I put it in the fridge in our condo to stay cool and then we left for a few hours to explore town. When we went back to the condo to get our food for the pot luck we couldn't find the salad. We talked to the manager and she had THROWN IT ALL AWAY thinking it belonged to the last people!!!! I reacted as any four-year-old would have and I started to cry, stomped out of the office, and sat in the car and ignored everyone for an hour. The salad had taken me ALL day to make and it was just really upsetting and I didn't care about being "good."

Usually I am a pretty even tempered, well behaved, mature adult. But there is something about tragedies in the kitchen that unleash the inner, more immature child in me. I just can't get over the wasted ingredients, RASPBERRIES for heaven's sake, and the TIME. It is just sickening.

Will I try these again? Perhaps. When the grief and pain wears off. :) Hopefully I can have a success soon to wear away the pain. But I think you should try them and give me some tips. Happy Cooking.

Granola Bars

I have been keeping out an eagle eye for good snack foods to send with my hubby to school or to take in my purse for my little guy. These seemed to be perfect. I completely stole this recipe and put it in a word document and I can't figure out which website it's from. SORRY!

Granola Bars:
1/2 cup oats
1/2 cup chopped almonds
1/2 cup raisins

3 T. oil (I used half Extra Virgin Olive Oil and half applesauce)
1/2 cup brown sugar
1/2 cup natural smooth peanut butter
1/2 tsp cinnamon
1/4 tsp salt
1 T water

1. Mix nuts, raisins, and oats in bowl.
2. Whisk other ingredients on the stove on low heat until the sugar dissolves. I know, it looks like a spatula in there...but you should really use a whisk.
3. Dump the wet stuff over the dry stuff and stir it up.
4. Press it down on a pan. I made a double batch. So if you're just making it regular I'd use a square pyrex dish. Make sure to line it with parchment paper.
5. Bake at 300 for 30 minutes or until it starts to brown around the edges. I cooked mine for 35 and they're not crunchy, more of a chewy texture.

6. Slice and dice em' and put in personal sized baggies for a quick snack.


Notes:

- This is basically a cookie, you saw how much sugar is in these babies. Maybe I'll cut it in half next time or use honey instead.

-Next time I will use all oil, I think that's a part of the reason that mine were so cookie-like.

-Next time I will add more oats/almonds/raisins to the mixture. They are a little too gooey. After eating them today I think that that is the problem. I will post again when I make them next and let you all know how that goes. :)

Our favorite food EVER=Peanut Butter

Today I spent ALL morning in the kitchen. It was the best. My little guy was super excited about helping me so we had a ton of fun together. Our first project was homemade peanut butter. Since this is a favorite of our family I knew it was important to make sure we were getting the natural stuff.

I talked to a lot of people about how to make it and looked online and everyone basically said that you just stick peanuts in a blender and add salt and sugar to taste. I had to add a little olive oil too because my blender wasn't strong enough.

Peanut Butter:
Roasted Peanuts
sugar
salt
extra virgin olive oil

1. Start with 1 C of peanuts and 1 T. of Oil. Blend until creamy (it's okay if its still grainy, just blend until it's looking like peanut butter.


2. Keep adding peanuts, 1/2 cup at a time and blend until it's all blended in and just keep adding. If your blender gets stuck and the peanuts are too thick you can always add a little bit of oil to help it out. My goal was to add the smallest amount of oil possible since peanuts already have a lot of oil and I'm trying to get a healthier alternative to Jiff.

3. Once you added all the peanuts you want (I used about 4 Cups) then turn the blender on and let it run for a few minutes so that you can get it nice and creamy. This is also a good time to add sugar and salt if you want it. I'm guessing that I added about 1.5 teaspoons of salt and 1-2 tablespoons of sugar. Just keep tasting it and see what you think it needs for YOU.

4. Pour in jars or Tupperware and store in the refrigerator.
We love it! Zac said that he prefers it to the store bought brands by a lot. YEAH! I love to hear that!
I was SHOCKED at how easy this was. It was cost effective too. It cost me less then four dollars to make two pints.

Tuesday, May 25, 2010

Raspberry Crepes

My focus has always been on providing a healthy dinner for the fam, everything else I just sort of let happen. Now I have a new determination to make breakfast for them too...who knows what's next...well probably lunch.

I've been on the hunt for yummy breakfast meals and I found a great recipe for crepes here:
Link

They aren't as quick as cereal, but they also don't have as much crap and sugar in them as cereal so it's a pretty good trade off. The batter is no big deal to make because you just throw everything in the blender, but it does take a while to cook them since it's a one at a time deal.

CREPES
1 cup freshly ground white wheat flour
1/4 C powdered sugar
1 tsp salt
1 cup milk
2 eggs

1. Throw everything in the blender. Blend until smooth, it doesn't take more than 30 seconds.

2. Pour about a pancake size amount onto a small pan. Then swirl the pan around so that the batter spreads out to the edges. I didn't understand this instruction at first, but you actually have to pick the pan up and move it around so that the batter spreads and the crepe becomes super thin.
3. They cook best at a heat a little less then medium (3.5 on a scale of 1-10) but this means it takes longer. Flip it when it has turned light brown (I forgot to take a picture).
4. You can add a little butter to each side and refry each side if you want them a little crispier.
5. Put any fresh fruit inside and eat like a burrito. You can sprinkle with powdered sugar or cream if you want. We used raspberries today because they were on a great sale!
They looked and tasted awesome, I'll try to remember to take pictures of the finished product next time I make them. I love these because there's a higher fruit-to-crepe ratio than you get with pancakes or waffles. This is going to become a staple in our home!
Notes:
-I doubled the batch and it made 16 large crepes, it took quite a while to cook them all! About 2 minutes per side or more. Me and Mr. T just set up some legos in the kitchen and played while we waited - I set a timer so I wouldn't forget to flip them. :)
-I'm putting them in the freezer so that I can just pull out 4 or 5 for breakfast on mornings when I'm short on time. You can just refry them to defrost so they don't get mushy.

Wednesday, May 19, 2010

What to do with a Fridge full of veggies...

Yesterday was farmer's market day, WHOO! I love it! Check out my loot:


Dinner was stir fry here is my very simple recipe:

Stir Fry:
Broccoli
Pea Pod
Carrots
Zucchini
Squash
onion
Chicken
Terriyaki Sauce
1. Cut up all the veggies into chunks. I make the carrots smaller cause they take forever to cook and the zucchini bigger so they don't get mushy.
2. Add the veggies one or two types at a time in order of time they need to cook. For example, carrots need to fry for like 20-30 minutes before they're soft and zucchini needs like 8 minutes. Here is the order I used:
1. Carrots & onions
2. Peas
3. Broccoli
4. Chicken
5. zucchini/squash
Not putting all of them in at the same time made a HUGE difference in the texture. The taste was the same, but the veggies weren't so soggy. I always feel like I have to cook it forever for the carrots to get done, this was the brilliant solution from Zac.
3. I just put terriyaki in there throughout the process and add some water if the veggies are sticking to the pan. This isn't as much of a recipe as it is an idea. Just do things for your own taste. :)
4. Serve over rice.
This meal is SO adjustable. I realized afterwards that I forgot peppers, but it was fine. It works for any vegetable and it is so healthy. My body is craving it now!

Sunday, May 16, 2010

Creamy Poppyseed Dressing

This recipe came from a friend of a friend of a friend's mom I think...haha Thank you Hall family for you contribution. :)

Salad:
Spinach
Iceberg lettuce
Bacon
Broccoli
Avocados
Hard boiled eggs
Mozzarella cheese, grated

Dressing:
1 C oil
3/4 C vinegar
3/4 C sugar
1 tsp dried mustard
1 tsp salt
1 Tbsp poppy seeds
½ red onion, sliced


1. Put all of the first 5 dressing ingredients into a blender and blend until it's creamy.

2. Add Poppy seeds and red onion, mix it up, and refrigerate over night. You can eat it if it hasn't been refrigerated, but it just tastes better once all of the flavors are blended.
3. Make your salad. Now obviously you can add whichever ingredients you want for the salad, but I just gave some suggestions.
4. Enjoy this DELICIOUS dressing and salad as your dinner or as a side dish. We tried the baked chicken again with the egg whites and it was a major success! Such a delicious combo with the salad and chicken, yum!

Really from scratch spaghetti sauce

I have to admit I'm proud of myself on this one because I made up the recipe myself. I did have to call my mom and ask a few questions, but I think it's really delicious and it is really healthy!

Spaghetti Sauce:
12 Medium Sized Tomatoes cut in fourths
8-10 cloves of garlic, minced
3 small onions, cut in fourths
2 peppers, cleaned and cut into fourths
1 jalapeno, cleaned
Basil (1 bunch fresh...maybe 1-2 tablespoons)
1 tablespoon salt
2 tablespoons brown sugar
1/4 teaspoon Cinnamon
1 can Tomato Paste
1-2 lbs cooked ground beef or sausage

1. Cut up all the veggies, you don't need small pieces because they're going to take a ride in a blender.

2. Blend all of the Veggies. I had to blend the ingredients in two groups because my blender wasn't big enough. It is going to look a little pink and foamy and maybe make you nervous, but don't worry, after it simmers it looks normal again. Note: you can add zucchini and broccoli too, just jam the stuff full of veggies!)

3. Put in a large pot/pan and add the rest of the ingredients. Bring to a boil and let simmer for a few hours. You can also put it in a crock pot.

4. This is mine after about 1.5 hours of simmering, notice how it's more red instead of pinkish now. Mine was a little watery tasting so I just let it simmer a little longer to evaporate some of the water.

5. Serve over noodles OR use as a sauce in lasagna. I used it for lasagna and it was enough to make a HUGE lasagna plus another little one in a bread pan.

I love that this is so packed with veggies and tastes so good. Next time I do this I'll probably freeze it in quart sized jars and store them in my freezer for future meals.

If you have a special ingredient that you put in spaghetti that I missed please share it! I don't think this recipe is perfect....yet. :)

Wednesday, May 12, 2010

Yummy Alternative to Fried Chicken

So about 6 months ago I posted a yummy recipe for Sweet and Sour Chicken. For the recipe we deep-fat-fried the chicken in vegetable oil (soybean oil really). Instead today we found a recipe for breaded and baked chicken that is still delicious but a healthier option. It was EASY too, and the clean up was quicker.

Here it is on allrecipes.com.

Oven-Fried Chicken
1 Cube of butter
1 Clove of garlic, minced

3/4 Cup dried bread crumbs
3/4 Cup freshly grated Parmesan cheese
1.5 Tbls Parsley
1 tsp salt
1/8 tsp pepper

2 Chicken breast, cut into strips

Steps:
1. Melt the butter with the garlic and put in a bowl.

2. Mix all the dry ingredients in a bowl

3. Dip the chicken strips in the butter, then roll them in the breading mixture and put on a pan.
4. I like to line my pan with aluminum foil, just so that clean up is easier.

5. Bake at 350 for 20 minutes. Turn them over and bake for 10 more minutes. We used really small pieces of chicken because we were hungry and wanted them to cook fast, but next time I'll probably just make a few larger pieces and increase the cooking time. Make sure to check that the chicken is fully cooked before you eat it!

This chicken went PERFECTLY with the veggies/rice/sweet & sour sauce taste. Yum. Dinner was way good tonight.
Looking back I will try a couple things differently to make it healthier.
1. use bigger pieces of chicken so that there is less butter per part of chicken
2. Use beaten eggs instead of butter for coating the chicken.
The butter does help it get nice and crispy though...it's a toss up. :)
happy eating.

Health Nut Muffins

I LOVE these muffins. Teagan thinks they're "cupcakes" and gobbles them up, but they're secretly full of great stuff. I try to keep them on hand for healthy snacks when I don't have time to make something. I double the batch and put them in the freezer so that they don't all get eaten in 2 or 3 days. :)

The original recipe is here on allrecipes.com. I changed and added a lot so here is my version:

Muffins
2 Cup Shredded peeled apples (1 apple makes about 1 cup)
1 1/3 Cup Sugar

1 Cup craisins or raisins
1 Cup finely shredded carrot (about 2-3 carrots)
2 eggs lightly beaten
1 tsp vanilla
1/3 Cup Sour Cream (optional)
1/2 Cup Extra Virgin Olive Oil

2 1/2 Cups Whole wheat flour
2 tbls Ground Flax Seed (optional)
1 tbls baking powder
2 tsp baking soda
1 tbls Cinnamon
1/2 tsp salt

1. Put the shredded apples and sugar in a bowl and let them sit for 10 minutes. (As you can see I accidentally through in the carrots and had to try to take them back out). I really wonder if this step is necessary, but I'm too afraid to leave it out.

2. Mix all the other ingredients in the bowl. I am bad and never mix the dry ingredients separately, I HATE dirtying extra bowls, but it probably wouldn't hurt to do that since EVERY baking recipe says to.


3. Pour the batter into your cupcake pan. Using cup cake holders isn't mandatory, I've sprayed my cupcake pan before with pam and put the batter straight in and it works fine. But these sure make clean-up easier

4. Bake for 20 minutes at 350. I would do the toothpick check. The original recipe says 25-30 minutes, YA RIGHT! They would be crispy if you let them go that long!

Note: All of the items that I marked as "optional" I didn't use today because I didn't have them on hand. I have used those items in the past though and the muffins are still delicious, if not better. They didn't raise quite as pretty before, I think because of the flax seed, but they still tasted fantastic.

Tuesday, May 11, 2010

Chicken Pot Pie

This blog is going to have a little bit different of a focus now. It's going to focus on my discoveries. Our family is striving to live a healthier lifestyle with little to no processed foods and TONS of fresh fruits and veggies. When I find a delicious and nutritious meal that my husband loves and 2 year old will eat then I'll put it up because that means it's got to be a keeper.

I am unleashing the most popular meal item that is served at my home. My husband, Zac, told me it's his #1 meal and requested to have it once a week. My 2.5 year old, Teagan, gobbles up his whole plate. I think it's pretty darn good and I know that it's healthy so we're all happy.
Here is the basic recipe, I'll explain each step with pictures below.


Chicken Pot Pie
5 Carrots, chopped
1 head Broccoli, chopped
2 medium potatoes, cubed
1-3 Chicken Breasts, cubed


1 onion, small diced
4 cloves of garlic, minced 1/4 C of Butter
1/3 C Whole Wheat Flour (white's okay too)
1/4 tsp pepper 2 C Chicken broth
2/3 C Milk (I use 1 %)

1-2 pie crusts

1. Wash the Veggies, aren't they beautiful, I just love how bright they are. You can also use peas, zucchini, squash, and celery but we didn't have any of those on hand so this is what we had. Just remember that if you add another veggie to use a little bit less of the others. The possibilities for this one are endless.


2. Chop/dice/cube/cut all the veggies. You're going to boil them so try to make the about the same size.
2. Cut up the chicken. I use 1 chicken breast because we are poor and meat is expensive so we use it sparingly for sure! I think that 2 would be ideal and 3 chicken breasts might be a little too meaty.


3. Throw the veggies and chicken into a pot full of boiling water and cover them up. You can add salt or a bullion cube to add flavor to the veggies, I never do though because I'm trying to lower our salt intake.
4. Cut up the onions and cloves of garlic and put them in a pretty big pan.

5. Saute until the onions are transparent.

6. Add flour and pepper and mix it all up so it looks like this:

7. Add in milk and chicken broth. NOTE: For the broth I just use bullion cubes with water. Also, I didn't have any milk when I made this today so I just left it out and did extra broth, it wasn't as good and I don't recommend it.


8. Mix it together until the sauce starts thickening. Make sure you get out all the lumps. After you let it simmer for 5 minutes or so it will start thickening up.

9. When the veggies are soft, or at least pretty close, drain out the water and put them into a casserole dish or a 9X13 pan. I use a casserole dish because it comes with a lid and 1 pie crust fits perfectly. If you use a 9X13 you probably will need 2 pie crusts.

10. Pour the Sauce on top of the veggies and mix them. I personally don't like it super wet so this is what mine looks like. You can always pour a little milk on top if you don't think there is enough of the liquid part.

11. Top with your favorite pie crust and make a few slits just before popping into the oven. I used a whole wheat variety.

12. Bake at 425 for 45-50 minutes or until the pie crust is golden brown. I let mine go the full 50 minutes today and the crust was a little over done, still tasted great though.


Pros to this recipe:
1. Lots of veggies
2. VERY easy to make during nap time and just let sit until an hour before dinner. I love that all of the dishes and pans can be cleaned before dinner even starts.
3. CHEAP CHEAP CHEAP
4. Guys LOVE it. We have had other couples over, Zac's friends, the missionaries. The girls all like it and say it's delicious, but the guys go crazy for some reason.

Cons:
1. half a cube of butter
2. not a super quick and easy recipe, it usually takes about an hour from start until the mess is cleaned up.
3. Chicken bullion is full of junk that I can't pronounce
We love this and I hope you will too. :)