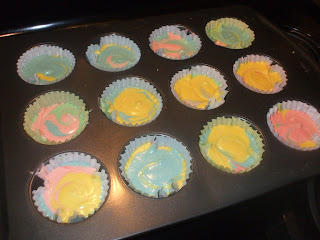
You start with your choice of white cake. I didn't remove the egg yolks and it made the colors look a little browner, I would recommend removing the egg yolks for a true WHITE cake.
This is the recipe I used, it is really good, but you need to follow the instructions very carefully!
White Cake
 Decide how many colors you want and divide up the batter and put in the food coloring.
Mix them all up.
 This part allows for creativity. The idea is to just spoon a scoop of each color into each cupcake holder. It doesn't have to be neat. I found that if I wanted the colors to really swirl I needed to only put a small amount of the last color on top. Does that make sense? This is what mine looked like about half way through. I just randomly scooped different colors into each tin.
 Bake normal and you get party cup cakes! ( Do you see what I mean about the brown tint? You live and learn!)
The bottom 4 are from the first batch where I put too much in each scoop and on the top color so the colors didn't really blend. The top 8 are the second batch. I did lots of small scoops of batter and stirred alot. I think some combination of the two would be the ultimate winner.


I was so sad to frost these babies, and cover up the art, but what is a cupcake without a heap of cream cheese frosting on top???
Here is how I make frosting.
Mix a package of cream cheese with a big scoop of margarine and a small scoop of shortening until it is nice and fluffy. Add about a capful of vanilla and keep adding powdered sugar until it tastes good. Very rich and healthy!
3 comments:
Oh my goodness they look great! how fun!
What a domestic little woman. I am so impressed!
These look so fun!!
Post a Comment